

BOOOO!!!!
It's the day before Halloween, and I am preparing accordingly.

Usually, holidays mean dessert. Halloween is a slight exception; Halloween means candy. Which means, I'm off the hook!
 |
| I have never seen a more excited jack-o'-lantern in my life! picture courtesy of drinks.seriouseats.com |
 |
| Image courtesy of Wikipedia |
But around Halloween, you start seeing a deviation from your traditional round, notched peanut-filled candies. The Reese's marketing team starts doing backflips trying to give you even more reasons to buy candy on Halloween. They start producing things like

This pumpkin-shaped Reese's! --Or:
 |
| picture courtesy of whatimdoin.wordpress.com |
A Reese's with a pumpkin on it!
My response?

BRING IT ON!!!!

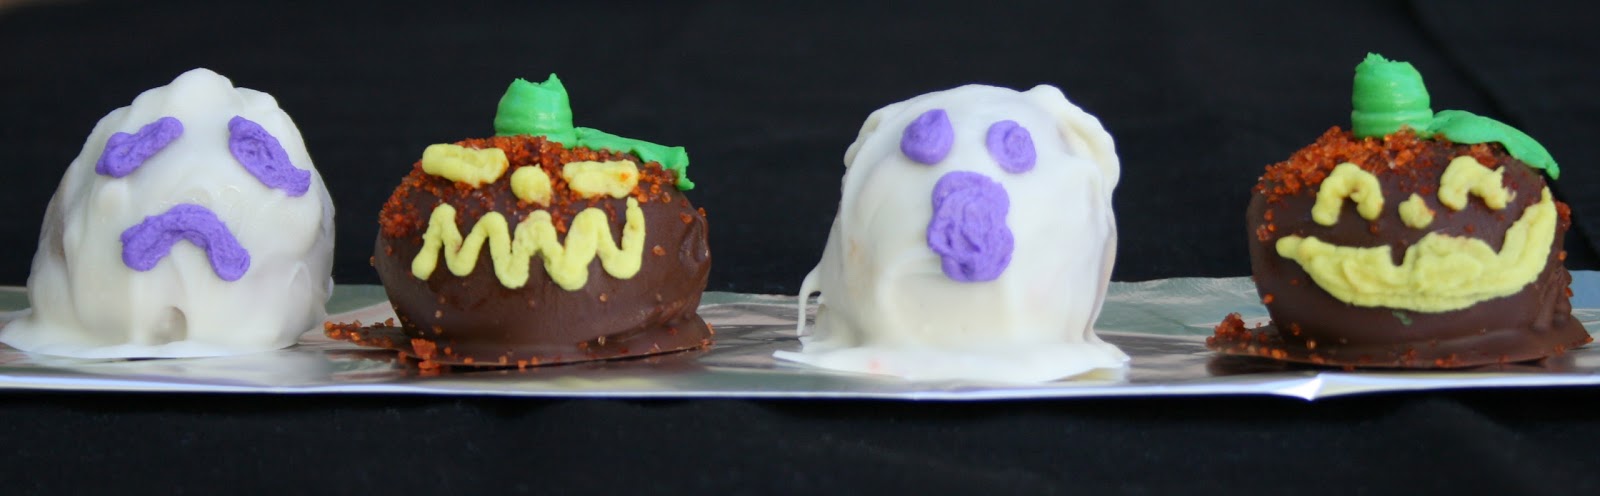
Peanut Butter Bites (which currently happen to be shaped like ghosts and pumpkins)
These chocolate-coated, peanut-butter filled candies are like bigger, tastier, less artificial versions of traditional Reese's peanut butter cups. I chose to decorate mine in the spirit of Halloween--but you can decorate them however you want to honor the occasion, or leave them plain to savor the irresistible taste. Here's the recipe, as well as pics of how I decorated them!
Side note: this is actually my grandmother's recipe. I actually called her the other day for this recipe. Now you know it's good.
Makes about a dozen candies!
Ingredients
1/4 cup butter
1/4 cup brown sugar
3/4 cup powdered sugar
1/2 cup smooth peanut butter
1 tsp vanilla extract
10-12 oz chocolate chips. Whatever kind you like!
2 tbsp shortening (optional: it supposedly makes the outer chocolate coating shinier and stiffer, but I hate shortening so I abstained)
Sprinkles, colored buttercream, or other decorating materials!
Instructions
- Melt the butter and brown sugar in a saucepan on the stove. Take it off the heat. Stir in the powdered sugar, peanut butter, and vanilla.
- Prepare a cookie sheet with foil on it. Form the peanut butter mixture into your desired shape, using about 1 tablespoon per candy. Put the balls on a cookie sheet and put the tray in the freezer for about an hour to let the balls harden up.
- Prepare another cookie sheet with foil on it. Melt your chocolate (and the shortening) in a double-boiler. Using a fork, drop the balls of dough into the melted chocolate and move around until they are evenly coated, then deposit on the cookie sheet.
- If you intend to decorate your candies with buttercream, put them back in the freezer; otherwise, put them in the fridge to harden up and they are ready to eat! I recommend storing them in the refrigerator so they don't melt.
- For pumpkins: Form your peanut butter filling into short, squat disk-like shapes. Immediately after covering them with chocolate, cover with orange sprinkles. After freezing, use green buttercream to pipe a stem and leaf onto the top of the pumpkin and yellow buttercream to draw the features.
- For ghosts: Form your peanut butter filling into taller, cylindrical shapes with a round top. Cover with white chocolate. After freezing, draw on features with purple buttercream.
 |
| The filling. It should be pretty thick and malleable, even while warm. |


Left: pumpkin fillings. Right: ghost fillings.
 |
| My pumpkins after being covered and sprinkled |
 |
| My buttercream! I made way too much; I ended up using less than half this amount. Your frosting should be pretty thick to make sure your designs will stay. |
 |
| I used the large tip on the left to pipe the stems for the pumpkins, and the small one on the right to form the features. |
I didn't use a tip for the pumpkin leaves; I used this technique that simply involves snipping the pastry bag. Pretty neat!


 |
| Here's for those of you who prefer slightly demonic-looking ghosts... |


The only problem is...how am I going to bring myself to eat these guys?
No comments:
Post a Comment