

I took my last final two days ago...I finished my last college app yesterday...it's winter break and I have no more essays to write...
I am now OFFICIALLY a second-semester senior!!!

YAAAAAAAAAAAAAAAAAAAAAAY (and PHEW!!!)
Time to cook and sew to my heart's content!!!
Yesterday I was so intoxicated by my newfound freedom to do whatever I wanted (as opposed to studying and writing essays bleagh) that when Serious Eats emailed me a recipe for a chocolate-chestnut torte, I was like LET'S GO FOR IT!

I actually ended up adapting a hazelnut-chocolate torte recipe instead, because I like hazelnuts better and I didn't have any chestnuts. Unfortunately, I didn't have any eggs either, which I was so excited to get started that I didn't realize until halfway through making the confection, which led to me running down the street in my slippers to borrow eggs from my angelic neighbor. Thank you Edye!!! I also accidentally added double the sugar I was supposed to at the beginning, so I had to make a batch of cookies instead and start the cake over (you can't let butter and sugar go to waste!). Not my smoothest dessert, clearly. Cut me a break. I'm still getting back in the groove ;)
But eventually all the right ingredients ended up in the mixer together. I think the cake came together quite nicely, don't you?

I decorated the top with powdered sugar using a homemade cake stencil. Within a few days I'll post a tutorial about how to make your own reusable cake stencil from stuff you probably have lying around your house! If you're reading this thinking, "Less art, more eating!", a liberal dusting of powdered sugar would, I'm sure, look just as inviting plus have the added advantage of covering in all the bald spots. Or you could just cut to the chase and slather the thing with Nutella ;)
The cake turned out to be pretty good! It was moist and fudgy and tasted like Nutella. Here's the recipe!

Chocolate Hazelnut Torte
This cake is dense, nearly-flourless, incredibly moist, and almost fudgy in its texture. A dash of amaretto provides a subtle, underlying flavor. It's easy to throw together and great for Christmas!
Ingredients
6 oz dark chocolate (the darker the better...I like the 72% dark chocolate from Trader Joe's)
5 oz (1 heaping cup) toasted hazelnuts
1 stick butter
1/2 cup plus 2 tbsp sugar
4 large eggs
1/2 tbsp vanilla extract
1/2--1 tbsp amaretto or other liqueur (I used 1 tbsp and thought it was kind of strong)
1/4 cup plus 1 tbsp flour
3/4 tsp salt
Powdered sugar, hazelnuts to decorate
Directions
- Preheat oven to 350 degrees (325 for a dark pan). For your pan, you have options. You can use an 8-inch springform pan, buttered liberally. Or you can use a 9-inch normal cake pan, buttered or lined with aluminum foil (that's what I did).
- Melt your dark chocolate in a double-boiler.
- In a food processor, grind your nuts finely. You want to chop them into very small pieces, about the size of grains of sand--but don't chop so much that they begin to form a mushy, oily butter!
- Cream the butter and sugar in the bowl of an electric mixer until light and fluffy. Add your eggs, vanilla, and amaretto and continue to beat until fluffy. Add the flour and salt. Add the hazelnuts and chocolate and stir just to incorporate.
- Pour your batter into your prepared pan. Bake for thirty minutes. When done, the sides of the cake should look fairly firm with air pockets on the surface, but the middle should still look slightly underdone. If you stick a toothpick in the center, there should still be streaks of chocolate left on it. Be careful not to overbake it!
- Let the cake cool. Invert it onto a serving plate and decorate. You have more options!You can dust the cake with powdered sugar, sprinkle it with crushed hazelnuts, cover in chocolate shavings, slather with Nutella...the possibilities are endless! I sprinkled the cake with powdered sugar using a cake stencil to produce the design, then garnished with hazelnut halves adhered with chocolate syrup. (Stay tuned; in a couple days I'm going to post on how to make your own cake stencils!)
- Enjoy!!!
 |
| Chopped hazelnuts. I could probably have made them a little finer. |
 |
| Finished batter |
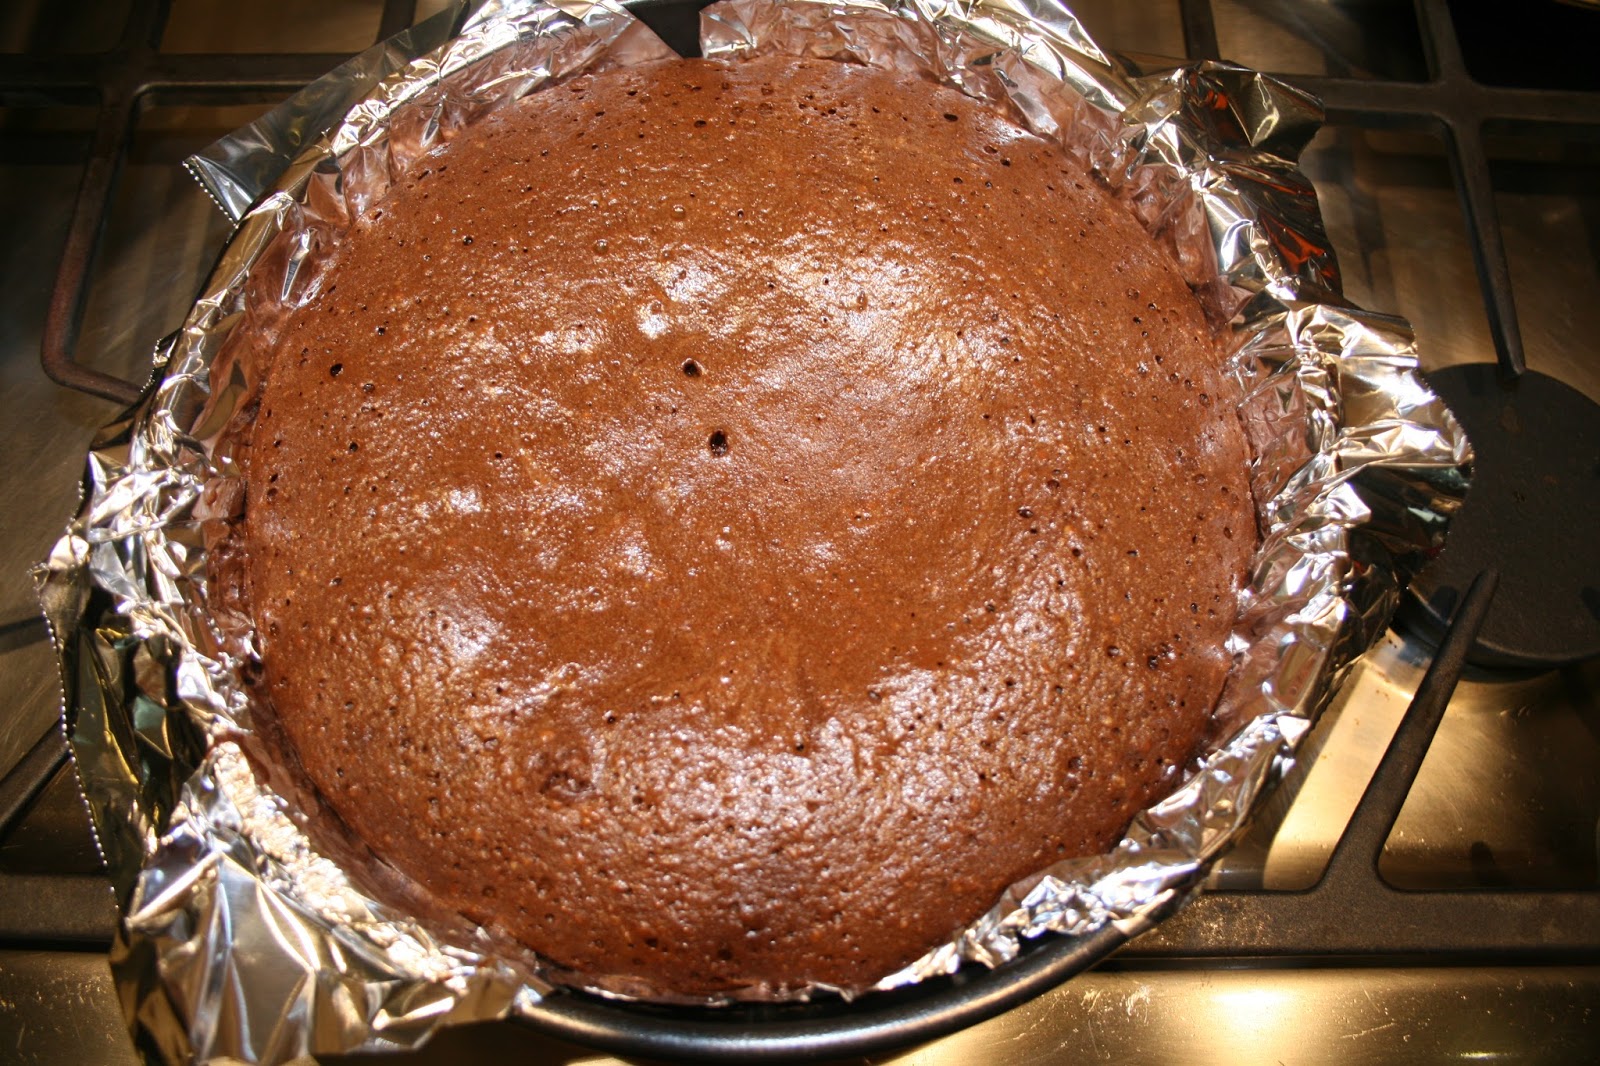 |
| Baked cake |
 |
| I flipped the cake over before decorating. This is the underside. Isn't it pretty? |
 |
| Cake stenciling at work! |


Now excuse me...I've got a sewing project to dig into!
Yaaay, I'm glad your finals are over and that it's time to start cooking and sewing again. Happy Sewing!
ReplyDeleteThanks Lauren! I promise that I will be a very happy seamstress!!!
Delete