


I'm really proud of this coat. For one, it's the first Advanced/Plus Difficile Vogue Pattern I've made! More substantially, it really pushed the boundaries of my sewing knowledge. It's probably the most meticulously tailored garment I've made so far. I learned a lot of new sewing techniques, like bound buttonholes and welt pockets (see my last blog post for detailed pics/tutorials!) And I think, for all the work it entailed, it turned out really well!

Here's the pattern I used--the oft lauded and blogged Vogue 1419 Ralph Rucci coat. I (like a lot of us), fell in love with it on first sight. Here's the line drawing so we can admire it more.


I knew pretty soon exactly what kind of fabric I wanted for this coat. I wanted a beautiful, soft winter-white wool, with just enough stiffness that it could support the flared silhouette of the skirt. When my mom and I went fabric shopping in New York, I looked all over for a suitable textile, and--shockingly--could not find anything I liked. Because I had a very clear idea of what I was looking for, and because it was pretty straightforward, I decided to try something unprecedented.
I ordered fabric online!
This is the first time I've ever tried online fabric shopping! In general I'm inclined against it, because real in-store browsing is just so fun! plus, seeing a textile in person is really the only proper way to figure out if it's precisely the right shade and texture for your project.
But I was pleasantly delighted by the online process. I purchased my fabric from Elliot Berman. I selected a couple promising-looking textiles, punched in my address, and a couple weeks later received a manila envelope in the mail. Easy as that! I was able to figure out which one I wanted and then ordered it online.

My fabric arrived protected in a plastic bag. When I pulled it out, it was carefully folded into a square and wrapped up with a beautiful red ribbon! It felt like Christmas!
 |
| If Max decides to put his face right next to my fabric while I'm taking a picture, then he's just going to show up on my blog! |

This is a wool blend (I think it was primarily wool, with a little bit of cashmere and poly). It's pretty soft and supple--ideally, it's probably a little too soft for this project.

I decided that I wasn't going to make a muslin because I didn't want to bother and this is a coat so fit doesn't have to be as precise as, say, a dress.
"The muslin – a very important part of coat construction...After all, you don’t want to spend all this time and money making a coat that doesn’t fit once it’s finished… do you?" -- Lladybird sewalong
"My sewalong co-host Lauren and I are as different as night and day, but on this we completely agree: You need to make a V1419 muslin before you cut into your fashion fabric." -- McCall blog sewalongOk FINE I'll make one! You guys get a fun picture.
 |
| Why do I have a lobster on my head? |
On the real garment, I topstitched the seamlines on the sleeves and the sides. I really like how it emphasizes the interesting construction of the coat!
 |
| It's a little hard to see in the photos, but the topstitching is slightly puffy and it looks really nice :) |

The actual pattern calls for nontraditional buttonholes. Instead of making a slit or square hole in the front of your coat, you are supposed to cut a notch into the front of edge of both sides of the coat and then use bar tacks to keep the button in place (for a better idea of how it's supposed to work, check out Lladybird's tutorial.) That sounded like a lot of work for buttonholes that were not wildly cuter than the average kind, in my opinion. I decided to make traditional bound buttonholes instead (see my last blog post), because I wanted to learn how to make them anyway.
I actually ended up trimming down the front edges of the coat a little bit so that I could pull the coat far over enough to fit snugly but not have too much excess overhang beyond the buttons.

I got my buttons at Barron's, a small sewing supply store near my house. They actually had quite a nice supply of buttons and were very friendly and helpful!
I also made welt pockets. Unfortunately, I noticed that they were gaping when I wore the coat. After some tacking and some ironing, they looked better, but I finally decided to slipstitch the left welt closed. One pocket is good enough for me! I should note that the pockets in the line drawing are completely horizontal, but on the actual pattern they're slightly slanted.

I also diverged from the pattern in that I decided to fully line (not underline) my coat. The pattern calls for binding all the seams with a bias-cut contrast fabric, which sounded like a lot of work and not as neat as the alternative.

For the lining, I used this white silk dupioni that I bought at Joann's. (You can get it pretty cheap there on sale, and it makes a good lining for nice garments.) It's thin but pretty stiff, which ended up being good because it gave some extra body to my coat, helping the skirt stick out and the collar stand up. I literally just made another copy of the coat and sewed it in around the front edge of the coat, the neck, and the sleeves. I also tacked it in place around the seamlines at the neck and shoulders so that the collar wouldn't pull.

That's about it in terms of construction stuff!
But even for all that work, here's what really blows my mind about this coat.
The designer version--the brown coat shown on the pattern envelope--cost ten thousand dollars.

I (a 17-year-old high-school student shuffling pieces in the middle of my dining room)--was able to complete an almost identically designed and tailored garment for about $125.
Plus, my version is (unlike the designer one) perfectly tailored to me, fully lined, customized with the kind of buttonholes I like, with buttons that are much cooler than the basic four-hole ones shown on the envelope, out of a beautiful winter white wool that is so much more gorgeous than the brown stuff Ralph Rucci used. (My opinion, of course, but that's the nice thing about making your own clothes--everyone can have one!)
The point I'm making is that sewing lets you have access to a quality of clothing that would be utterly, ridiculously unattainable commercially. Putting in a little elbow grease on significant details means that you'll end up with beautifully-tailored, lovely garments that it would be impossible to purchase. So weighing in on the debate about whether sewing saves you money or not, I assert that if you're considering high-quality, standout garments, sewing doesn't just save cash--it gives you access to clothing that cash can't even buy.

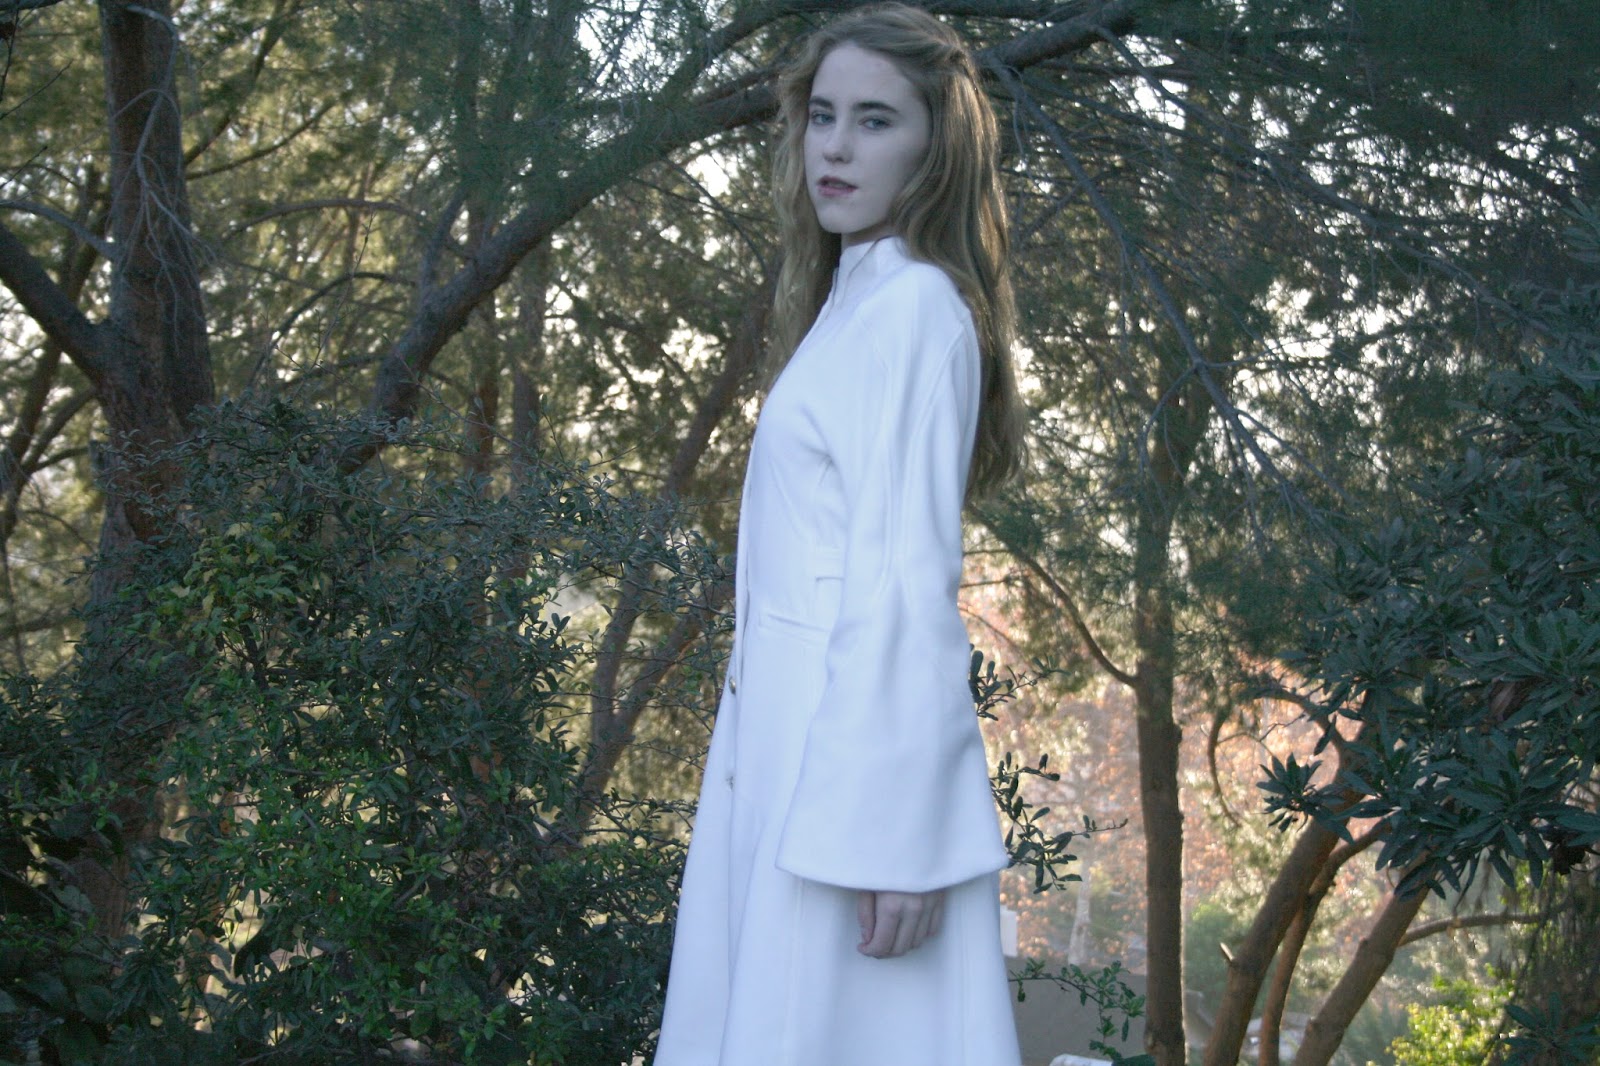
 |
| It also works pretty well worn casually over jeans! |


On to the next project!
This is gorgeous! You're going to wear this for many years. I love the color.
ReplyDeleteThank you! I love making coats because I know I'll be able to wear them for a long time. My mom has a coat that she made that's older than I am!
DeleteAbsolutely beautiful coat - I love it! And you did a fantastic job on such a complicated pattern.
ReplyDeleteThank you so much for your comment :) This is my first advanced pattern and I'm glad it came out as well as it did!
DeleteWow, great job! I hope you'll pin this to our fan gallery. Just sent you an invite to it.
ReplyDeleteThank you! I got your invitation and went ahead and pinned this coat--thanks for the invite!
DeleteThis is my favorite version of the pattern! Wow. And I agree that certain kinds of sewing can give you access to clothes money couldn't buy (unless you're a couture customer, and how many of those exist in the world?).
ReplyDeleteThank you so much! I love sewing because the quality and the uniqueness of the clothing you can create is lightyears ahead of anything you can buy. How else can you end up with a perfectly customized, perfectly fitted garment?
DeleteYour version is lovely, beautiful work. One day I hope to finish mine!
ReplyDeleteThank you! I would love to see your rendition of it.
DeleteLove the coat - cool design lines are a massive drawcard for me. It fits and looks beautiful - so versatile, too!
ReplyDeleteMe too! I love when I look at a design and have never seen anything like it before. I am a little nervous about the dry cleaning, but I think the color is worth it :)
DeleteAnelise that came out FAB! Love the Winter white! I am a wuss and would wimp out at having a white coat---I am too hard on stuff. I love seeing your skills develop! :) My 19 year old daughter loves to sew, also, and I am SO GLAD that there is a trend in your gen for the skills to be mastered, Clothing will always need to be made, and it is always useful, good for the mind, and soul.
ReplyDeleteCan't wait to show my daughter your coat. She is going to suffer some serious coat envy. :D
Thank you so much! I have the opposite problem--I find myself going for what looks nice with little concern for practicality, haha! I'm really glad (or at least optimistic) that sewing is coming back into vogue (no pun intended :D). It seems like there's a resurgence of DIY activity that has extended into clothing. Being able to sew is such a practical skill--I think everyone should know even just the basics, like how to attach a button or run a straight stitch through the sewing machine, because they're invaluable if you need a garment repaired or altered!
DeleteDoes your daughter have a blog? I would love to see what she's working on! It's hard to find other teenagers who sew avidly. :)
The Casino Guru: Casino Guru - Jtmhub
ReplyDeleteVisit JTG Hub to 양주 출장안마 enjoy our latest 경기도 출장마사지 reviews 고양 출장마사지 and find out if the hottest casino sites are right for you! We give you the best offers on the 남원 출장샵 internet! 동두천 출장마사지