

It was my brother's birthday last week. In order to understand my brother's birthday dessert, you have to understand my brother.
This is Max.

This is Max's phone case.

This is Max's favorite article of clothing.

 |
| Picture courtesy of australianwargamer.wordpress.com |

:D
The design of the cake itself is not all that complicated. The only tricky part is the blue square in the corner, which is achieved by replacing the top layer of cake with a blue ring and a red-on-white interior circle (don't worry about trying to picture it right now: full instructions with pictures below!).
Regardless, this cake is kind of a lot of work. It involves a lot of dividing batter, some strategizing, and a lot of mixing food coloring (so much that I have blisters from whisking in the dye. Who gets blisters from making cake?)
And I didn't even THINK about how high-maintenance this cake would be AFTER it was finished.


If the refrigerator light switch is flipped off when the door shuts, but no one is inside the refrigerator to see it, does it really go out?

Uhhh...

That sounds like an injunction to eat with your hands!

...Whoops.I'll have to console myself that the American flag will be immortalized indefinitely on this blog...because the cake is going to go pretty darn fast!
(Note: above Flag Code adapted from USA Flag Site thanks guys!)

American Flag Cake
This post is going to teach you how to construct your own edible symbol of patriotic fervor! This is the perfect dessert for the Fourth of July or any other date that could use a little American spirit. (Even better if you don't tell people what's inside: watch their eyes bug out as you extract the first eye-popping piece!). Step One: Baking the Cakes
You're going to need enough cake batter to fill four nine-inch-diameter cake pans, which is about two batches of a standard white cake recipe. Your recipe should be a vanilla/white cake that can stack pretty high, dyes ok, is sturdy, and can be cut without falling apart.
Dividing up these four recipes is a little tricky. Here's what you're going to need:
- One vanilla cakeYou're going to divide your batter into four equal parts. The first three you are each going to dye a different color, pour into a cake pan, and bake. The fourth section you are going to split in half--one half you will leave white, the other you will dye red. Put each color in a separate cake pan and bake, taking into consideration decreased baking time for the lesser thickness. Each of these smaller cakes should be half the thickness of one of the big ones.
- One red cake
- One blue cake
- One half-thickness red cake
- One half-thickness vanilla cake


 |
| The half-sized cakes |
 |
| Here's about how thick each of the half-sized cakes should be |
You want all of your red and white layers to be the same thickness. This means slicing your thick red and white cakes in half (so from each of the full-sized rounds you get two layers with the same diameter, but half the thickness). You should now have three white layers and three red layers, all about 1/2 inch thick. DON'T slice the blue layer!
Now it's time to prepare that blue box for the top left corner! This effect is caused by replacing the top solid layer of cake with a thick blue ring surrounding a circular section of red-on-white cake.
 |
| See? |
The first thing you need to do is stack your blue cake and one layer each of red and white cake on top of each other (remember that your red and white layers together should be about the same thickness as your blue cake).

Using a knife or a toothpick, sketch out a circle on the top layer by marking a uniform distance from the outer edge. For a 9-inch round, 1 1/2 to 2 inches is about the right width for the blue box.
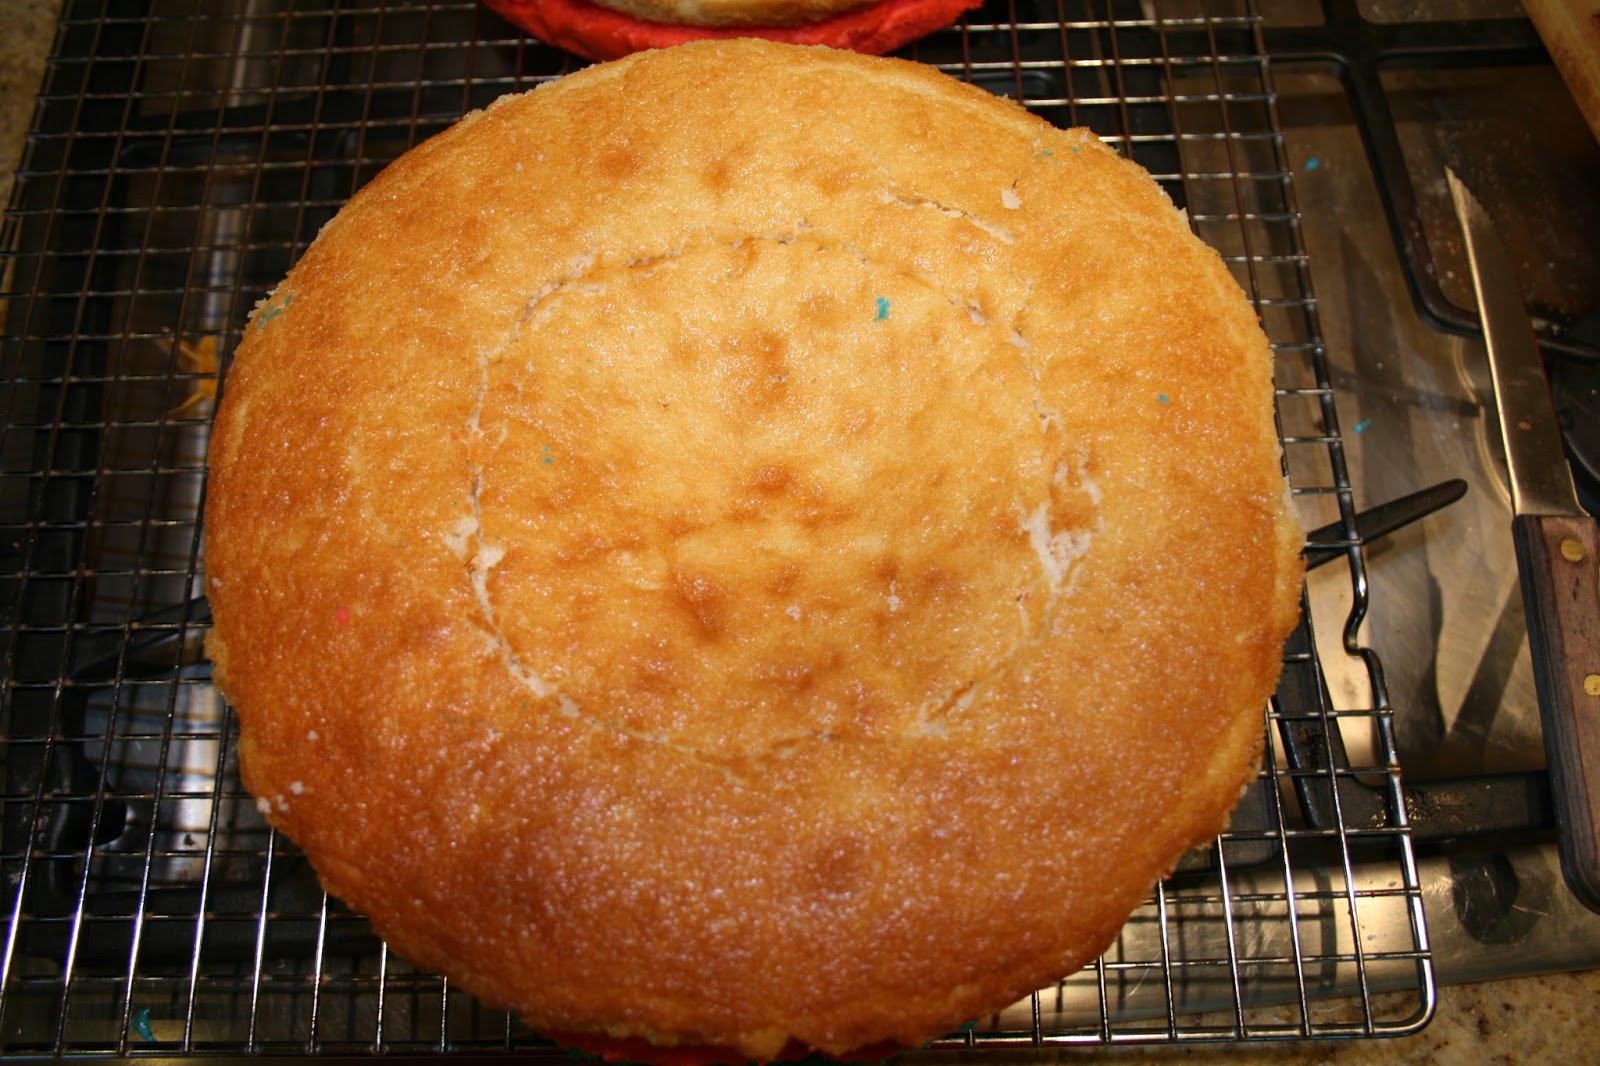
Now cut through all of the layers according to your marked circle.

You need to reserve the blue ring and the red and white circles for your cake. The blue circle and the red/white rings you won't be using, so you can keep them for snacking or cake pops!
Step 3: Constructing
Before you start building, make some buttercream to hold your cake together. You're going to need A LOT of icing; I ended up using 4 recipes!
Here's the order in which you will place down the layers. Each of the layers are separated by a thin layer of white buttercream. From the bottom up:
- white
- red
- white
- red
- blue ring
- white interior circle
- red interior circle


Step 4: Making the Exterior Presentable
You now have three different colors (two very vivid) of crumbs dusting your cake. If you don't want these getting mixed in with your icing, you're probably going to want to do a crumb layer. This just means that you put a thin, messy, crumb-ridden layer of icing over the entire cake to coat it. Once this layer has set, it is much easier to apply the final, neat, clean shell of icing without having half the cake showing through.
 |
| Here is my crumb layer. It actually looks kind of cool... |


Now to figure out the Union Jack ;)
Great post, thanks for sharing! If you love delicious cookies, don’t forget to check out the latest Tiff’s Treats Coupon codes to enjoy extra savings on your next order. Grab these limited-time deals before they expire!
ReplyDelete